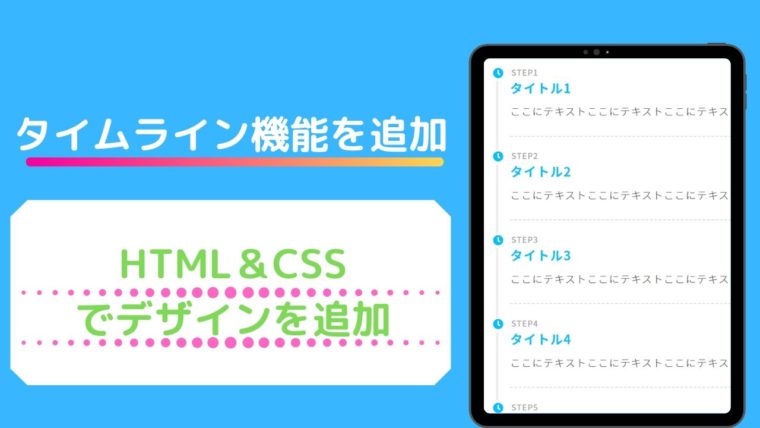
SANGOに使われているタイムライン機能がJINでも使えるように紹介されているサイトがいろいろありますが、今回僕がタイムラインのコードを入力したら、結構デザインが崩れました。
このタイムラインは、テーマエディターからfunctions.phpをいじることになるので、データのバックアップと子テーマのインストールを済ませておきます。

子テーマのインストールと有効化
子テーマをJINのサイトからインストールします。
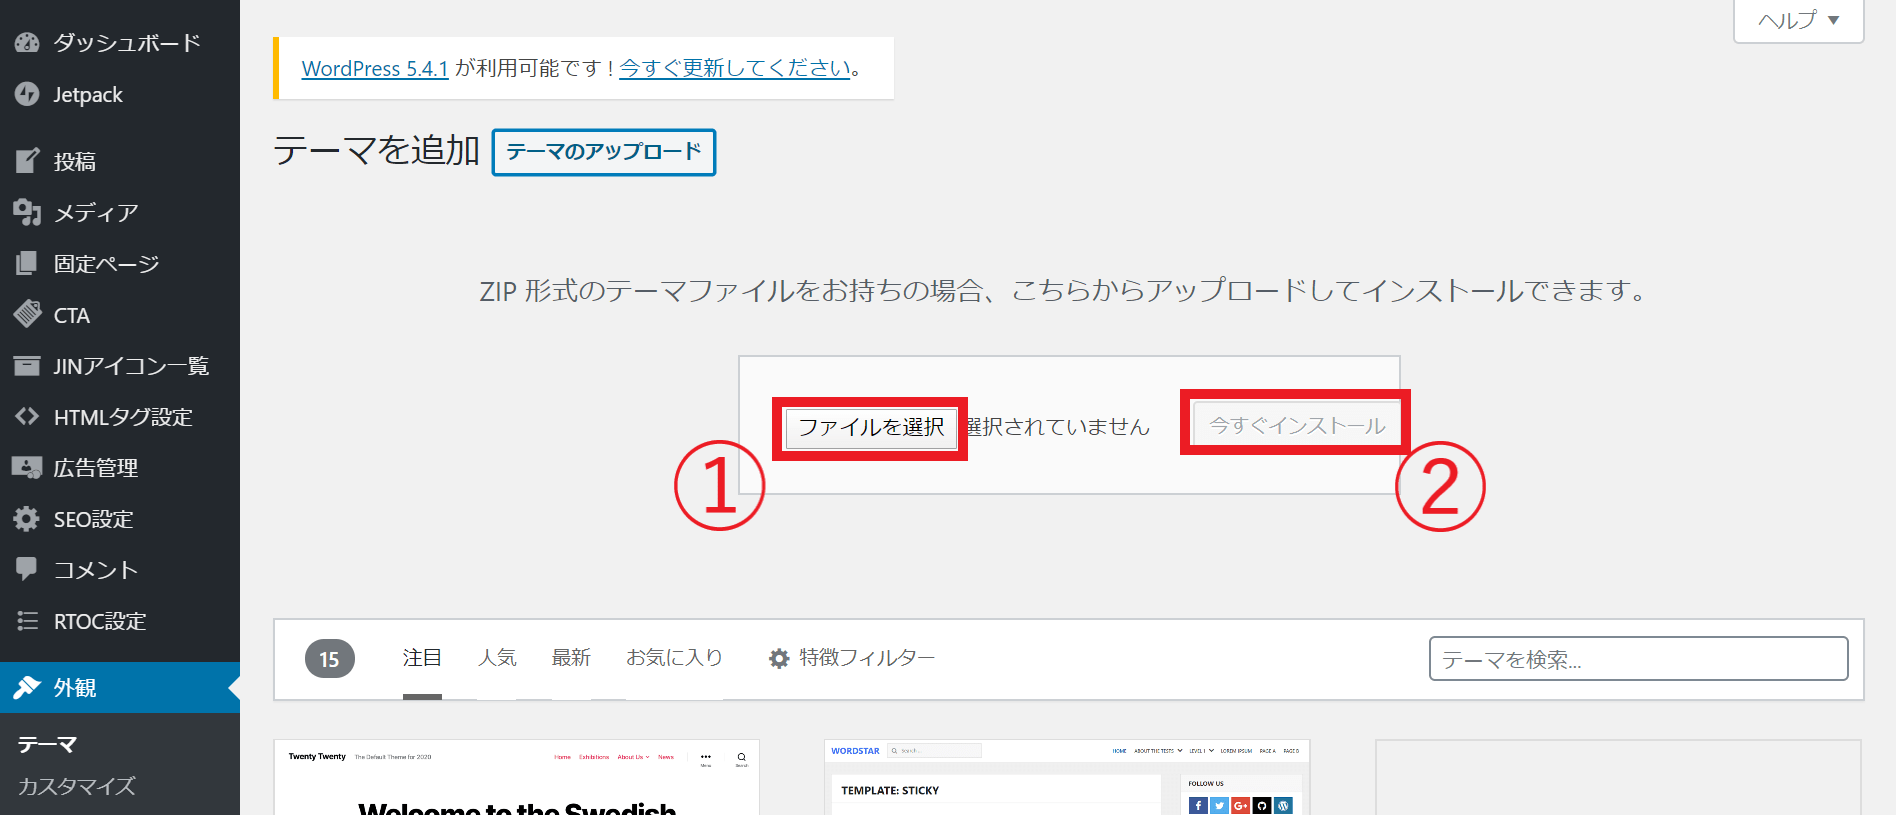 インストール後、外観→テーマ→新規追加→テーマのアップロードから、先程インストールしたJINの子テーマをアップロードし、今すぐインストールを押します。
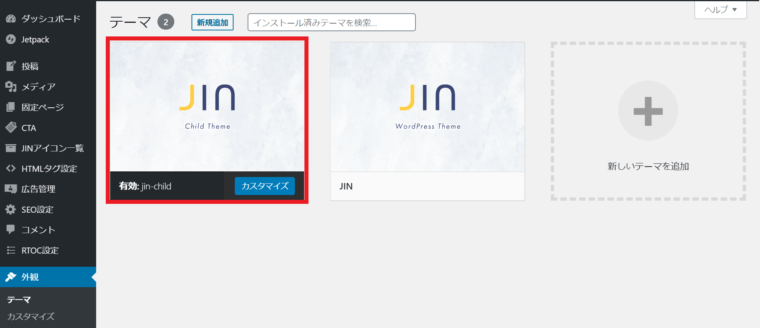 アップロードすると、外観→テーマと進んだところに、新しくテーマが追加されています。※画像ではjin-childのテーマが有効化されていますが、この時点では、有効化せずにJINのテーマのままにしておきます。
外観→カスタマイズ→エクスポート/インポートの順に進みます。
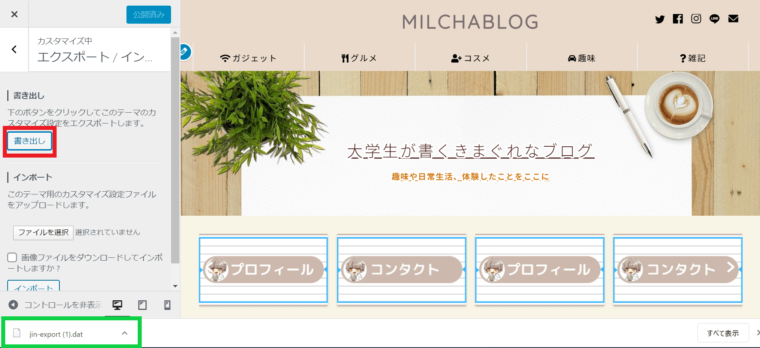 書き出しをクリックすると、今適用している親テーマのファイルがダウンロードされます。
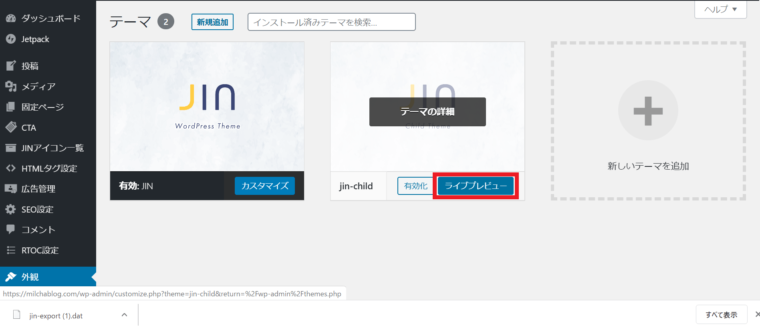 ダウンロード後、外観→テーマに戻りjin-childのライブプレビューを選択すると、カスタマイズ画面に移行します。(まだ有効化はしません)
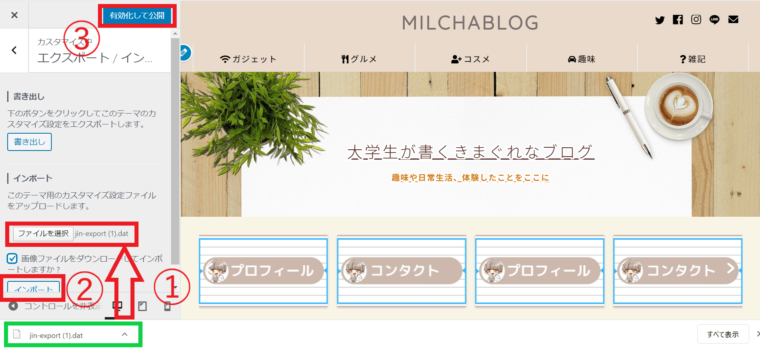 エクスポート/インポートに進み、先程ダウンロードしたJINテーマのファイルをアップロードし、「画像ファイルをダウンロードしてインポートしますか?」にチェックを入れ、
インポートをクリック。
インポートすると、子テーマに親テーマの情報が適用されます。
サイトのデザインが今まで使用していたデザインにかわります。
確認出来たら、有効化して公開を押します。
これで子テーマの有効化とデザインの反映が終わりました。
タイムライン機能のPHP&HTML&CSS
PHPコードをfunctions.php(子テーマ)にコピペする
下記のコードを子テーマ(jin-child)のfunctions.phpに追加していきます。
追加する場所は後で説明します。
//timelineショートコードコンテンツ内に余計な改行や文字列が入らないように除外
if ( !function_exists( 'remove_wrap_shortcode_wpautop' ) ):
function remove_wrap_shortcode_wpautop($shortcode, $content){
  //tiショートコードのみを抽出
  $pattern = '/\['.$shortcode.'.*?\].*?\[\/'.$shortcode.'\]/is';
  if (preg_match_all($pattern, $content, $m)) {
    $all = null;
    foreach ($m[0] as $code) {
      $all .= $code;
    }
    return $all;
  }
}
endif;
//タイムラインショートコード
add_shortcode('ptimeline', 'tl_shortcode');
if ( !function_exists( 'tl_shortcode' ) ):
function tl_shortcode( $atts, $content = null ){
extract( shortcode_atts( array(
    'color' => null,
    'marker' => null,
    'icon' => null,
  ), $atts ) );
  $content = remove_wrap_shortcode_wpautop('ti', $content);
  $content = do_shortcode( shortcode_unautop( $content ) );
  if ( $icon ):
   $tag .= '<style type="text/css">.ptimeline-wrap .'.$icon.' .ptimeline-item .ptimeline-marker:before{ content:"\\'.$icon.'";}</style>';
  endif;
  $tag .= '<div class="ptimeline-wrap">'.
            '<ul class="ptimeline '.$color.' '.$marker.' '.$icon.'">'.
              $content.
            '</ul>'.
          '</div>';
  return apply_filters('timeline_tag', $tag);
}
endif;

//タイムラインショートコード中身
add_shortcode('ti', 'tl_item_shortcode');
if ( !function_exists( 'tl_item_shortcode' ) ):
function tl_item_shortcode( $atts, $content = null ){
  extract( shortcode_atts( array(
    'title' => null,
    'label' => null,
    'icon_item' => null,
  ), $atts ) );
  $content = do_shortcode( shortcode_unautop( $content ) );
  if ($icon_item):
   $tag .= '<style type="text/css">.ptimeline-wrap .ptimeline-item .'.$icon_item.':before{ content:"\\'.$icon_item.'" !important;}</style>';
  endif;
  $tag .= '<li class="ptimeline-item">'.
            '<div class="ptimeline-label">'.$label.'</div>'.
             '<div class="ptimeline-title">'.$title.'</div>'.
             '<div class="ptimeline-main">'.$content.'</div>'.
            '<div class="ptimeline-marker '.$icon_item.'"></div>'.
          '</li>';
  return apply_filters('timeline_item_tag', $tag);
}
endif;
CSSコードをコピペする
- 外観→テーマエディター→子テーマ(jin-child)→スタイルシートに記述
- 外観→カスタマイズ→追加CSSに記述
CSSを記述する場合は、2つあり①のように直接子テーマに記述する方法と、②の追加CSSに記述する方法です。
基本的には追加CSSに記述するのをおススメします。
画面を切り替えずにプレビュー画面が見れるので、時間の短縮になります。
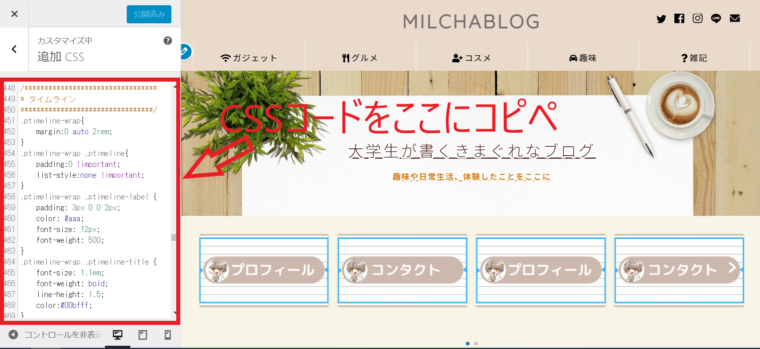 外観→カスタマイズ→追加CSSに記述する場合は、この赤枠の中にCSSコードを記述していきます。
下記コードがCSSコードです。
/*********************************
* タイムライン
*********************************/
.ptimeline-wrap{
    margin:0 auto 2rem;
}
.ptimeline-wrap .ptimeline{
    padding:0 !important;
    list-style:none !important;
}
.ptimeline-wrap .ptimeline-label {
    padding: 3px 0 0 2px;
    color: #aaa;
    font-size: 12px;
    font-weight: 500;
}
.ptimeline-wrap .ptimeline-title {
    font-size: 1.1em;
    font-weight: bold;
    line-height: 1.5;
    color:#00bfff;
}
.ptimeline-wrap .ptimeline-main {
    margin-top: 0.5em;
    padding: 0 0 1.5em;
    font-size: 0.9em;
    line-height: 1.8;
    border-bottom: dashed 1px #ddd;
    color:#555;
}
.ptimeline-wrap .ptimeline-main img{
  display:block;
  margin:1em auto;
}
.ptimeline-wrap .ptimeline-item {
    position: relative;
    padding: 0 0 1em 1.5em !important;
    margin-bottom:0 !important;
    border:none;
}
.ptimeline-wrap .ptimeline .ptimeline-item:before {
    content: "";
    width: 3px;
    background: #eee !important;
    display: block;
    position: absolute;
    top: 25px;
    bottom: -3px;
    left: 5px;
}
.ptimeline-wrap .ptimeline-item:last-child:before{
    content:none;
}
/*********************************
* タイムライン マーカー
*********************************/
.ptimeline-wrap .ptimeline-marker{
    display: block;
    position: absolute;
    content: "";
    top: 6px;
    left: 0;
    width: 14px;
    height: 14px;
    border-radius: 50%;
    border: solid 3px #00bfff;
}
.ptimeline-wrap .ptimeline-item:first-child .ptimeline-marker,.ptimeline-wrap .ptimeline-item:last-child .ptimeline-marker{
    background:#00bfff;
}
/*四角 */
.ptimeline-wrap .square .ptimeline-marker{
    border-radius: 0;
}
/* アイコン*/
.ptimeline-wrap .icon .ptimeline-item .ptimeline-marker{
    content:unset;
    border:none !important;
    background:none !important;
}
.ptimeline-wrap .icon .ptimeline-item .ptimeline-marker:before{
    font-family: "Font Awesome 5 Free";
    top: -1px;
    left: 0;
    position:absolute;
    font-weight:bold;
    font-size:16px;
    line-height:1;
    color:#00bfff;
}
.ptimeline-wrap .icon .ptimeline-item:first-child .ptimeline-marker,.ptimeline-wrap .icon .ptimeline-item:last-child .ptimeline-marker{
    background:none !important;
}
/* 画像*/
.ptimeline-wrap .tl-img .ptimeline-item .ptimeline-marker{
    content:unset;
    border:none !important;
    background:none !important;
}
.ptimeline-wrap .tl-img .ptimeline-item .ptimeline-marker:before {
    content:"";
    display:inline-block;
    background-image:url(ここに画像URL); /* 画像1番目*/
    background-size:contain;
    background-repeat:no-repeat;
    width:40px;
    height:40px;
    position: relative;
    top: -4px;
    left: -2px;
}
.ptimeline-wrap .tl-img li:nth-of-type(2) > .ptimeline-marker:before{
    background-image:url(ここに画像URL) !important; /* 画像2番目*/
}
.ptimeline-wrap .tl-img li:nth-of-type(3) > .ptimeline-marker:before{
    background-image:url(ここに画像URL) !important; /* 画像3番目*/
}
.ptimeline-wrap .tl-img li:nth-of-type(4) > .ptimeline-marker:before{
    background-image:url(ここに画像URL) !important; /* 画像4番目*/
}
.ptimeline-wrap .tl-img li:nth-of-type(5) > .ptimeline-marker:before{
    background-image:url(ここに画像URL) !important; /* 画像5番目*/
}
.ptimeline-wrap .tl-img .ptimeline-item {
    padding: 0 0 1em 3em !important;
}
.ptimeline-wrap .tl-img .ptimeline-item:before {
    top: 30px;
    left: 15px;
}
/*********************************
* タイムライン カラー
*********************************/
/* ピンク */
.ptimeline-wrap .pink .ptimeline-title{
    color:#f7bcbc !important; /* タイトル色 */
}
.ptimeline-wrap .pink .ptimeline-main{
    color:#555 !important; /* コンテンツ色 */
}
.ptimeline-wrap .pink .ptimeline-marker{
    border: solid 3px #f7bcbc !important; /* マーカー色 */
    color:#f7bcbc; /* アイコン色 */
}
.ptimeline-wrap .pink .ptimeline-item:first-child .ptimeline-marker,.ptimeline-wrap .pink .ptimeline-item:last-child .ptimeline-marker{
    background:#f7bcbc; /* マーカー色(最初と最後)*/
}
.ptimeline-wrap .pink .ptimeline-item .ptimeline-marker:before{
    color:#f7bcbc !important; /* アイコン色 */
}
/*イエロー*/
.ptimeline-wrap .yellow .ptimeline-title{
    color:#fdc44f !important; /* タイトル色 */
}
.ptimeline-wrap .yellow .ptimeline-main{
    color:#555 !important; /* コンテンツ色 */
}
.ptimeline-wrap .yellow .ptimeline-marker{
    border: solid 3px #fdc44f !important; /* マーカー色 */
    color:#fdc44f; /* アイコン色 */
}
.ptimeline-wrap .yellow .ptimeline-item:first-child .ptimeline-marker,.ptimeline-wrap .yellow .ptimeline-item:last-child .ptimeline-marker{
    background:#fdc44f; /* マーカー色(最初と最後)*/
}
.ptimeline-wrap .yellow .ptimeline-item .ptimeline-marker:before{
    color:#fdc44f !important; /* アイコン色 */
}
/*グリーン*/
.ptimeline-wrap .green .ptimeline-title{
    color:#2fcdb4 !important; /* タイトル色 */
}
.ptimeline-wrap .green .ptimeline-main{
    color:#555 !important; /* コンテンツ色 */
}
.ptimeline-wrap .green .ptimeline-marker{
    border: solid 3px #2fcdb4 !important; /* マーカー色 */
    color:#2fcdb4; /* アイコン色 */
}
.ptimeline-wrap .green .ptimeline-item:first-child .ptimeline-marker,.ptimeline-wrap .green .ptimeline-item:last-child .ptimeline-marker{
    background:#2fcdb4; /* マーカー色(最初と最後)*/
}
.ptimeline-wrap .green .ptimeline-item .ptimeline-marker:before{
    color:#2fcdb4 !important; /* アイコン色 */
}
HTMLコード(ショートコード)の追加
投稿画面で入力するコードになります。
AddQuicktagというプラグインを導入しておくと、コードの呼び出しが1クリックで出来るようになります。
[ptimeline marker="icon" icon="Font Awesome"]
[ti label="STEP1" title="タイトル1"]ここにテキスト[/ti]
[ti label="STEP2" title="タイトル2"]ここにテキスト[/ti]
[ti label="STEP3" title="タイトル3"]ここにテキスト[/ti]
[ti label="STEP4" title="タイトル4"]ここにテキスト[/ti]
[ti label="STEP5" title="タイトル5"]ここにテキスト[/ti]
[/ptimeline]
- Font Awesomeにアイコンコードを入力
- STEP1~5/タイトル1~5/ここにテキスト/にそれぞれ文字を入力
アイコンはFont Awesome5からUnicodeのみをコピペします。
JINアイコンを使用する場合は、先程追加したCSSを書き換えます。
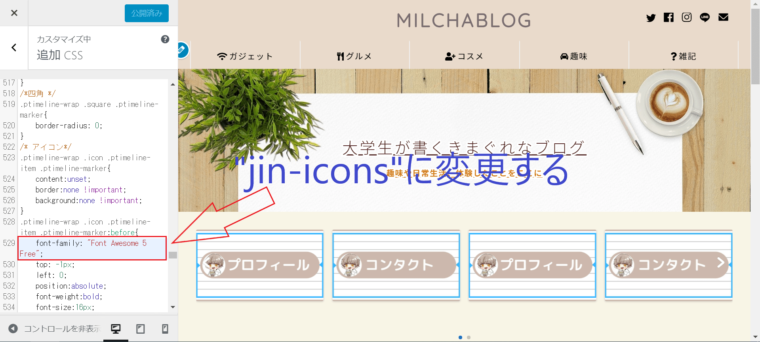
.ptimeline-wrap .icon .ptimeline-item .ptimeline-marker:before{
    font-family: "Font Awesome 5 Free";
この”Font Awesome 5 Free”の部分を”jin-icons”に変更してください。
タイムラインのデザインは、ぽんひろ.comでいろいろ紹介されています。
PHPコードを追加する場所
僕もコードが反映されずに悪戦苦闘していたのですが、僕みたいな素人は結構間違えやすい部分だと思うので解説します。
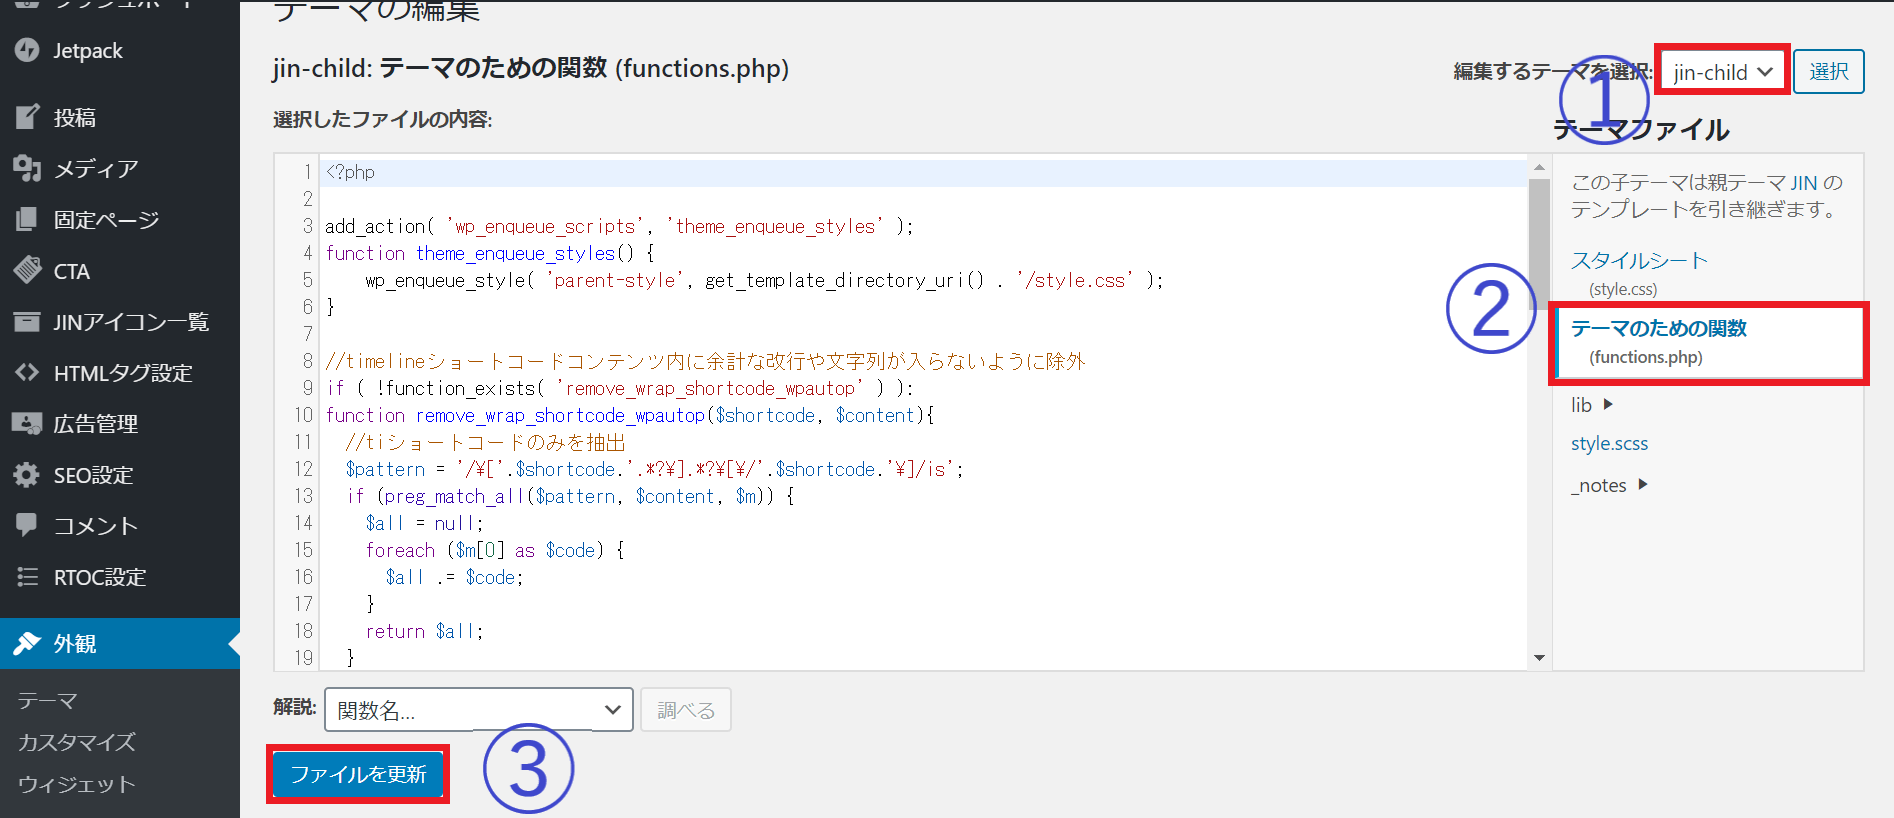 子テーマをインストールした人は、JINとjin-childの2種類のテーマがあるかと思います。テーマエディターをいじる時は①jin-childを選択してから②functions.phpをクリックし、PHPコードを記述して③ファイルを更新します。
タイムラインのコードが上部に表示される場合
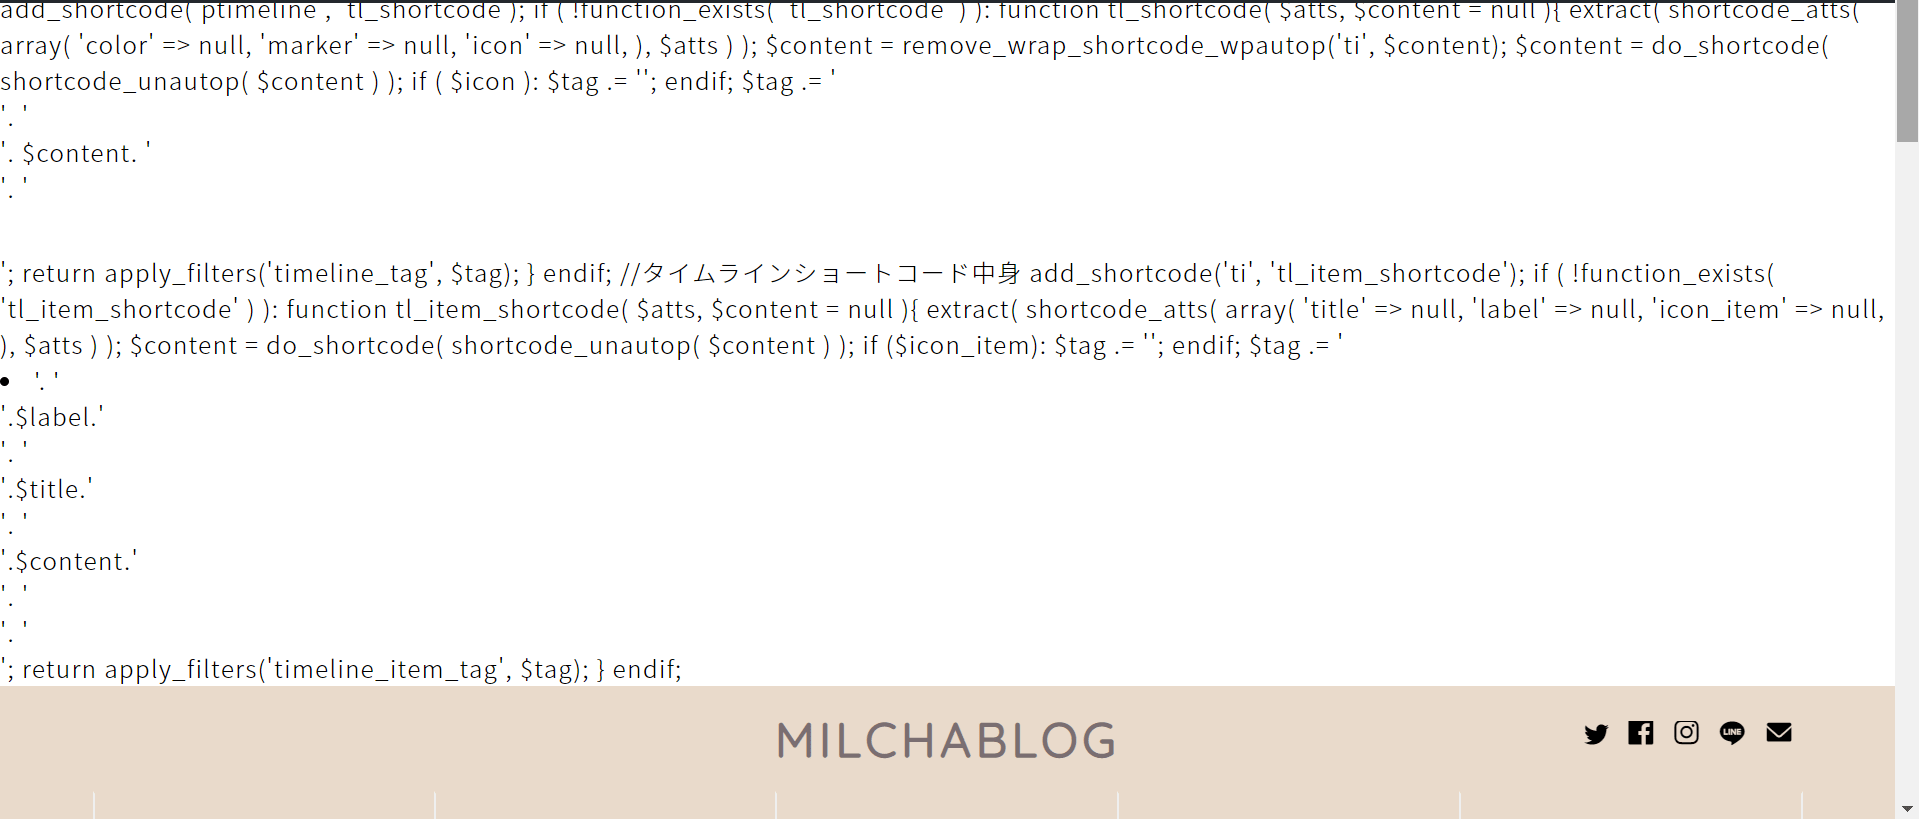
PHPコードをfunctions.phpに記述すると、このようにヘッダー上部にPHPコードが表示されてしまう場合があります。
functions.phpに記述した時に正しい場合はコードに色が付きますが、反映されない場合は、コードが黒文字のままです。
文字コードが上部に表示されてしまう原因は、JIN(親テーマ)に記述している場合が多いかと思います。
JINの子テーマをダウンロードし、jin-childのfunction.phpに記述することで改善します。JIN子テーマのダウンロードはこちらから